Quantcast
Channel: Grumble Jones - An ASL Blog
Viewing all 557 articles
Browse latest View live

Grumble Jones November Scenario - GJ026 "Chamber of Deputies"

$
0
0
Remember to open link in a new window to maximize the view. The PDF for this scenario can be downloaded from the The ASL Scenario Archive. (simply search on Chamber of Deputies or Grumble Jones)


And always remember, these monthly scenarios are presented for fun only and as a thank you to the readers of my blog.
This month's scenario is dedicated to France and the French People. 

The Conclusion of AP42 Frontiers and Pioneers

$
0
0

 Our Monday game saw the conclusion of AP42 Frontiers and Pioneers. We picked up the game at the start of Turn 3. By the time the German phase of Turn 4 had ended...so had the game. So it was a short night's gaming...but fun-filled nonetheless. Lots of last minute action as the Russian Armor completed its domination of the game. 

I had not respected the Russian armor and paid for it. The BT-5's ended up being the most valuable Russian asset. One BT-5 would KIA 2-1/2 of my 4-6-8's and destroy two tanks. Yuri Tuchenko would earn the Order of Lenin on this day.

 At the start of Turn 3, my grenadiers had gained a toehold on the central factory. My motorcycle hobilars had fared less well...with half of them KIA'd by the BT-5's. I learned a huge lesson about early war Russian Tanks...don't disrespect them...


 Back on the east edge, my remaining motorcycle dudes tried to get the flock out of Dodge. I sent my MK III to try and rescue them.


Honestly...there was no saving those clowns...
 I can't say that I was unhappy with the performance of my 4-6-8's. They had done a great job, but despite that, still couldn't take full ownership of the factory. And it didn't help when the Unconfirmed Killed KV-76 rallied and began to put a serious hurt on me. My opponent knew I was dangerously near my CVP cap. He also understood that taking out my last two tanks would give him the victory.


 The last remaining BT-5 raced back towards the west to confront my MK III, while the Commissar lead a 4-4-7 and a 2-2-6 to attack my MK III from the rear.

 My MK III would succeed in staggering the infantry assault and immobilizing the BT-5 before taking a kill hit from the BT-5 in the next phase.


 The fight at the factory had gone pretty well for my Germans. I managed to win the remaining melees and create a 7-0 after rolling snakes. Despite this, the Russians still held the O Row Factory Building. 


My grenadiers fought hard and took out the Russian infantry...but it would be the Russian Tanks that would secure the victory for my opponent.


As the Russian BT-5 rushed across the North Edge, the Russians in the O Row Factory skulked out of harm's way. The KV-I pushed its way out of the factory and came directly at my immobilized Pz38T. Both of my remaining tanks had been immobilized. Soon they would be knocked out and seal my fate. I had run out of options...


The situation as we completed Turn 3.  All my opponent needed to do was to destroy my final two tanks and it would be game over.


The Russian Commissar went after my MK III, but would fail to knock it out.


The Soviet Commissar would turn in a great performance in this scenario!!!
 My MK III would disable it's Main Armament while taking an Intensive Fire Shot.

 The situation at game end as I surpassed my CVP cap with the loss of my final remaining tanks. The saddest part was that my infantry had finally taken control of the Center Building complex. A dollar short and a day late...

It's going to be a long war Hans....

Congrats to my opponent Scott Holst for a well played game!

ASL Scenario J35 Siam Sambal - Turns 1-3

$
0
0
For our Monday game, Scott Holst and I agreed to play a French based scenario in light of recent events. Siam Sambal was selected with Scott as the attacking French in Cambodia - 1941. I drew the Siamese defenders. Now this is also quite a scenario as it includes the following: PTO Terrain, Tanks, Trucks, Cavalry, Off Board Artillery and a Siamese Fighter Bomber. Can't imagine squeezing any more into this one!!!


This scenario would also be a first for me as I would field a Siamese Army. Never done that before....

Hey...but I'm always game for the ASL Dance!!!


I was, however, a bit concerned about fighting 4-5-8 French Foreign Legionnaires with '5' ELR!!!


Some tough hombres!


 The game opened with a strong French push of Legionnaires and two tanks along the southeast edge. My defense was not mutually supportive and as a result the French were able to gain a toehold in the wooded area that was the key to my flank. Drats!!!


Ya gotta protect your flank!!!


 My single 4-4-7 gave a good account of itself before routing away.


 Scott's Legionnaires made good progress overall on their first turn move.


 My Siamese hurried to take up new blocking positions.


 Turn 2 saw Scott's French moving aggressively to push along the east edge. My boys threw some punches...but overall the French had the better of my Siamese.


 My Turn 2 Prep was largely ineffective, but did manage to hurt the 9-1 stack. I was also able to manhandle my 82* MTR out of harm's way.


 Turn 3 opened with the French reserves entering on Board 35 from the south and west edges. Scott's strategy for his tanks and trucks was to hide them in the palm trees to hid them from my Fighter Plane.

Looks like a case of concealment loss....


 The main French force entered on the west edge. I had a 4-4-7and my 75* arty protecting this area.


 12 French squads in total. These boys may be the key to a French victory...


 View from the Siamese Fighter Plane as he buzzes the battlefield.


 One of the highlights of Turn 3 was the rally ability of my 8-0. Dude successfully rallied two DM'd 4-4-7. Awesome moment!!!


 As the French came down the road on the west edge, my hidden 75* Arty opened up. It managed to DM one squad and pin another. 


Scott's boys laughed off my arty fire and one 4-3-7 just completely ignored my fire!!
 Back on the southeast edge, the Legionnaires kept coming and gradually drove me back. My 9-1 broke and ran to the rear, leaving behind a KIA'd 4-4-7.


 The French auto park in the jungle!


 My reserves also came on in Turn 3. I sent my single tank to support my boys in the southeast.


Hoping for big things from my Tankers!

 The French on the west edge managed to eliminate all Siamese resistance.


 To support the northwest, I sent 7 mounted squads to hold the village huts. But I goofed and forgot that huts don't block line of sight. It would cost me a DM'd squad.


 As Turn 3 ends...the Siamese fighter plane can be heard skimming the jungle canopy looking for French targets!!!


As we conclude Turn 3, my Siamese cavalry take up positions in the the Northwest Village. They will have to hold out against a lot of French troops...

Tune in next Monday for the conclusion of Siam Sambal!!!


I suspect the Legion will be heard from!!!

Siam Sambal J35 - The Conclusion!

$
0
0
Our Monday game saw us playing out the final Turns of ASL Scenario J35 - Siam Sambal. While the first three turns had been a fairly even contest...Turns 4 and 5 would belong to Scott Holst's men of the French Foreign Legion!


 The positions at the start of Turn 4 showed that most of the necessary victory location hexes were still out of French control. So as we began play...I was confident that my Siamese could hold the line...


Yeah...sorta felt like...we got this...


 Scott elected to move most of his troops in Turn 3. My circling plane quickly pounced on the Legionnaires in Hex M7. A pin and a DM half-squad would be the result...so not too shabby, especially as this location housed the French MMG and Mortar.


So far so good for my little fighter plane!
 On the west edge, the French reinforcements moved rapidly to take my abandoned arty piece and eliminate the crew, which they would do in Advancing Fire.


Scott's French would be consistently good in the last two turns played of this scenario. 
 The French tank that had been acquired by the Siamese Tank pulled behind a building and would go on to DM my boys in P2.

 
 Back on the east edge, my Siamese continued to try and hold the wood line and keep the French from getting into the village. The French fire was effective enough to DM a key 4-4-7 squad behind the wall. Their breaking would prove to be fatal to stopping the French from moving into the houses.


Scott's French would put down just enough effective fire to allow their boys to move up in Turn 5.
 In the Northwest, my boys tried to move into position to hold the village, but the huts offered little protection and added hindrances to my own fire as the French consolidated to make their push to occupy the edge of the village.

Yep...I was beginning to realize that my defense was unraveling!!!

 The French continued to press forward and were unafraid to move into the open to force the issue. My Tanker had to make a decision...pursue the French tank and maybe kill it from behind or take the overrun opportunity on two 4-5-8's...decisions...decisions...


 I decided to go for the back to back overruns...with 12 flat...there was a better than average chance of breaking both squads, which would take a lot of pressure off my boys in the woods.


Unfortunately, Scott's Legionnaires rolled snakes and battle-hardened and created a Hero...yep the perfect storm!!!

The Hero would play a key role in eliminating my Tank in the upcoming French Close Combat Phase.


 Yep...you guessed it...I picked the wrong day to stop sniffing glue!!!
 After my tank failed in both overrun attempts, I was forced to leave it in motion and just hope for the best.


 Back in the west, the French continued their movement pretty much unhindered.


 As the game worn on...my morale check rolls continued to be less than stellar. And if memory serves, I failed every morale check for the remainder of the game.


 Back on the east edge, the French were finally getting the toehold into the village. The door was wide open.


  Back to the Northwest, my boys were forming up, but were still a bit too far back to effectively keep the French out of the unoccupied huts.

 My boys continued to pour on what fire they could and they would succeed in breaking a squad here and there.
 
 Back on the east edge things went from bad to worse for my forces...if you look closely you will see that the Siamese fighter plane is missing. Yep...he went for a point attack on the French  in O2. 6 down 2 shot...and yes you guessed it BOXCARS...immediate recall and bye-bye air cover.


Losing my plane was huge and would remove a key asset from my defensive arsenal. 


And yes...I was a little bit hacked off...


Once Scott's boys occupied the first few huts in the Northwest village, they dug in. At this point, Scott had amassed nearly 20 victory points. So there was no need to advance further and risk losing squads.


 And on the East edge, Scott's 9-1 and Hero combined efforts to take out my tank in close combat.


Our game was nearing its end...
 A look at the final positions on the East Edge.


And a final look at the French armor group as it had begun moving forward once the Siamese air cover evaporated.

So with the conclusion of Turn 5, Scott and I both agreed that the game had reached it logical conclusion. The French had amassed over 24 victory points. It would be next to impossible for my Siamese to overcome that in the remaining three turns. So the concession was given and Scott's French took home the Gold!


Another great game!

ASL Scenario 16 - No Better Spot to Die - Turns 3-1/2-5-1/2

$
0
0
Our Friday game was a continuation of No Better Spot to Die with my regular St. Louis opponent.  On this night, we would complete Turns 3-1/2 through 5-1/2. In this brief span of time, the complexion of the game would change greatly and the Germans would succeed in piercing the center of the US position.

 At the start of Turn 3-1/2, I attempted to repair my Malf'd Mortars...6, 6 and no more mortars. Hmm...I though to myself...tonight is already off to a magnificent start. Fortunately, my opponent's dice were no better. His first Prep Fire rolls were 11, 10 and 12, which broke his MMG on the North edge.


Yes it was...as once again the Dice dictated success or failure...or is that another of the ASL myths...


 Towards the South, one of my tanks had moved to occupy one of the US MMG positions.


 During Turn 4, my forces were once again on the advance. My tank in the South decided to make a run for the American rear. And in so doing...quickly revealed the location of the HIP US 57L AT Gun....oh joy....

You'd think after all this time...I would stop sending my armor off without infantry support...but you'd be wrong...as once again...my unsupported armor would ride off to its demise.

The US 57L AT Gun kept its ROF and went after my infantry in F7...but would miss with their single HE round.


 The stars indicate possible victory conditions for my Germans. If I can hang on to 3 houses by game end, then my boys will get the victory.


Securing La Fiere remains my goal!

 I took some risks with my infantry...which did not pay off. Most of my boys crept through the gully and towards the center woods. My one of my 4-6-7's in F7 made a run towards the American 57L AT Gun. The US MMG to the North caught them and cut them down.


  And of course it kept ROF...


 I sent my remaining tanks north to put some additional pressure on the US troops there. I needed to make sure as many squads as possible made it into the center wood.


I don't expect too much from my tanks...but you never know!

 My efforts in the South had thus far met with abject failure...but things were looking very good in the center for my Germans.


The gully became my way forward!


 My opponent quickly surmised that the gully was a bit of an Achilles Heel and tried to interdict my moves as best he could from either flank.


 Back at the West edge, my only remaining officer was a wounded 8-0. He would set to work rallying what men he could and sending them back into the fight!


Keeping good order squads is a central requirement of this particular scenario as both sides face a possible Task Check to their best good order leader, should more than half of their original squad count be broken. Failing the Task Check would result in that failing player's forces requesting a Truce. My Germans were staying well above the half-way mark...but only 1 squad separates the Americans from DOOOOOOMMMM....muhahahhaa....
 The situation as Turn 5 began.

 
 The Americans in the H2 Gully faced a dilemma....they couldn't take a shot with their bazooka without moving to crest...and my tank was waiting patiently for them to pop their heads up!


 C'mon...take a chance boys!!!


 Back on the South side...the US Paras in I7 popped out of their foxholes and were promptly DM'd. But the Paras with the MMG had rallied and once again moved into the J8 building.


The situation as Turn 5-1/2 ended. My Germans have penetrated the center of the US line and are poised to strike into La Fiere and take the 3 buildings needed for the win. 

Next Friday can't come soon enough!!!


until next Friday night when the cardboard warriors once again stride upon the earth!


The Conclusion of ASL Scenario 16 - No Better Spot to Die - Turns 5-1/2 through 9

$
0
0
Our Friday night game saw the conclusion of ASL Scenario 16 - No Better Spot to Die. This particular scenario took us three sessions to complete, but we had a blast throughout. Like a good football game, the lead changed several times over the course of 8 full turns. And by the time, this game concluded, both sides were bloodied and weary. And the conclusion of this scenario would be true to the determined fight put up by both sides.


But as we started our SKYPE session...I once again felt confident that my boys would achieve victory...

ahhh...but ASL is a fickle mistress...and the dice always find a way...


Ready for action...


This scenario's victory conditions require the German player to control 3 buildings on Board 24 at the conclusion of Turn 9.  9 Turns is a long time...and would prove to be too long for my Landsers.

The other interesting aspect of this scenario is SSR #3, which requires either side to have their best Good order leader to take an NTC should more than half of that side's original squad count are broken or otherwise not in good order. Failure of the NTC would result in that side requesting a truce, which could be accepted or rejected. As fate would have it...my Germans would refuse two truce offerings by the Americans...

Of course...there would be moments during Turns 7 and 8 when I would wonder if I should have accepted the American Truce offer...


The Snipers would once again show themselves for both the Germans and the Americans with lethal consequences for us both. In the case of the Germans, I had finally moved a 4-6-7 with an MMG into the gully. After having moved everyone else, they were to going to move last and help secure the building in Hex# J8. The US Sniper changed that in a heartbreak by pinning them.


Having established my central position in the woods separating my opponent's forces, my strategy was to break the US 7-4-7 in J8 and the crew of the adjacent 57L AT Gun, while moving a squad or two into some of the M row buildings. My plan had one critical flaw which had not yet revealed itself to me...


One of the things which would hurt my cause later in the game, would be my careless handling of my broken squads. My opponent would pay special attention to my broken half-squads and it would be the difference in the scenario.


The green star denotes another one of the critical gaps in my strategy. While moving into the center, I assumed that the concealed US 7-4-7 would eventually engage my Renault R35 Tank. But my opponent realized that the gully could serve his needs as well as it had the Germans. He ignored my tank and crept down the gully to gain the rear of my boys in the woods. I had thought of leaving a squad in the H5 gully fork hex. As I watched my opponent gain my rear...(sounds bad however you imagine it!!!), I knew I had made a huge error.
In such little ways...an ASL game is often lost or won...and this single 7-4-7 would rescue my opponent's cause.

As previous AAR's have revealed, my regular STL opponent likes to eliminate enemy squads. This proclivity would serve him well in this scenario as he eliminated my DM'd half-squads.


But even as my opponent ran his 7-4-7 into my exposed rear...I had succeeded in pushing the Americans out of the J8 house and pinning the stalwart US crew of the 57L AT gun. 


I was still feeling pretty confident. After all, it wasn't like John McClain was running the American effort...right!?!
Then the John McClain moment came. My opponent...whose truces I had rejected was now in my grill and causing mayhem. His gully 7-4-7 rushed into close combat with a 4-6-7 with one of my precious LMG's. Close Combat...oh how I hate it...because I just can't seem to win them. 

My internal screaming would eventually come out as my opponent's 7-4-7 would ultimately destroy 2 of my 4-6-7's in close combat and break enough others to snatch victory from my grenadiers.


That's right...tell me when it's over....
Even though my opponent was disrupting my rear...my Landsers had managed to secure three buildings. Now...if we could only hold on to them...


There it was...the moment when I had my three buildings...but the 7-4-7 K6 and the dang AT Gun crew were still battling hard. 


How quickly the game had changed. The US anchor positions on the North and South were both occupied by my boys...but in the center...my woods were now home to a pesky 7-4-7 that was dealing death all around me. Not content with killing my squads, it also took aim at one of my Renault R35 Tanks with predicable and painful results.


Scratch another German Tank!


Yes...I needed a hug...

In the North my final tank had succeeded in forcing the Americans out of the J2 house. So I had taken four buildings...but in the center, the US 7-4-7 was hammering away at my boys with one of my LMG's. And I wasn't passing my morale checks...


Yes...I went once more into Close Combat with the crew of the 57L AT Gun...you'd think I could at least win that one...but no...MELEE...seriously...??!!!


My opponent's DM'd 8-0, 7-4-7, and 3-3-7 would all rally. Good grief...at one point, my opponent was down to 1-1/2 squads...now he was once more on the move. The gully 7-4-7 in K6 would successively break units. Two of my broken half-squads would gain the attention of one of my opponent's 3-3-7. This 3-3-7 would move to ensure that both half-squads would be DM'd. They would be out of the game and would help force me to take the dreaded Truce NTC.


My boys were starting to wear down.
Only two turns earlier...the center was all but a German Teutoberger Wald...now it was an American forest preserve. A single 7-4-7 had all but taken the center from my Germans. My building control had fallen to just two and time was running out.


My turn 8 movement phase...the critical moment in the battle had been reached. I had two building...but needed a third. My 4-6-7 battling the US 57L AT Gun crew had dispatched them and was free to make a run to the 010 building. But could they survive the fire from the K6 7-4-7...??
My boys would make it as my opponent rolled a 10. I had secured a third building once more. But I had to ensure control. I had succeeded in pinning the K6 7-4-7. This convinced me that I could send another 4-6-7 into Close Combat with the hated 7-4-7. I had to ensure that my boys held on going into Turn 9.
My opponent transformed before my very eyes and I suddenly realized that I had made my last mistake.
Yep...I should've known better...


Going into Turn 9, the heroic K6 7-4-7 had eliminated yet another 4-6-7. This single squad...who I mocked in the previous blog post had destroyed one tank, killed 2 x 4-6-7's in close combat and broken two other squads. They had single-handedly kept the Americans from losing the game. Furthermore, they had forced my Germans to take the dreaded Truce NTC.

I failed the Truce NTC and my opponent immediately accepted...game over baby!!!


Soooo close...I had the buildings I needed...all I had to do was pass an NTC...but I rolled a 9...

The hero squad of this game. This 7-4-7's...the "Gully Boys" had managed to shred my Germans.

...c'mon you don't have to rub it in...

The American 8-0 also did an outstanding job. He held the North flank the entire game.


A final look at my hero squad...the boys who made the final run to secure a third building location.


So after accepting my Truce offer...the game ended and will go down as a draw...but even as a draw...it was a great game!


ASL Scenario AP55 The Generalissimo's Own - Turns 1-2

$
0
0
Our Monday night game was the first two turns of ASL Scenario AP55 - The Generalissimo's Own. My regular Monday night opponent, Scott Holst has so far picked out some really interesting scenarios to play. It's a breath of fresh air not to be in the French Bocage or the Russian Steppes. On this occasion, I drew the Chinese and would be the attacker, going up against a formidable Japanese defense. Mr. Holst would have the burden of holding off a substantial Chinese force that would enter on Turn 1 and Turn 3. And additionally, the Japanese have two Fighter Bombers at their disposal.  All in all a very good scenario at first glance. 

 The setup caused some initial confusion as Scott had accidentally grabbed board 35 instead of 38 at his end. So when my armored cars entered the board on a road hex...Scott at his end of the SKYPE call had me entering in orchard. The Cardboard via SKYPE method is not without its challenges from time to time. But after correcting the map board, we were off the races!!


 The Chinese win this scenario by amassing more CVP at game end than the Japanese. Furthermore, each building location on Board 2a would be worth 2 VP. So I determined to make the buildings my initial objectives.

As my Tanks entered the game in Platoon movement, I learned a new rule. Using armored assault with platoon movement, would only allow for one tank to have a squad assaulting with it. Despite this limitation, my tanks and infantry entered the board and went after the first Japanese held building location.

There would be no stopping us!!!


 My Chinese also had 2 x 20mm AA Guns and 1 x 37L AT Gun. I moved these into the center. I really am not sure of their value overall...but I do think it can't hurt to have the 20mm's ready to take on the Japanese Fighter Bombers.


 Probably...the biggest head scratcher for my opponent was watching me move these fellas from the south edge of Board 38. Probably not my swiftest move...but by the middle of Turn 2, they were getting close to the woods housing my opponent's mortars. So I have high hopes that this group will give a good account of themselves.


I am confident that these squads have hidden talents!!
 Did I mention that my opponent had a formidable defense? If not, let's take a serious and loooong look at the pain, Mr. Holst has created for my Chinese.


Fighting against the Japanese is never easy!
 A good overview of my Turn 1 entry onto the board. My armored cars led the way and quickly attracted the attention of both Japanese Mortars. Fortunately, no shot found its mark.


The Japanese mortars are pretty cool to have as they have Smoke and White Phosphorus.
My forces that entered board 2a from the east came forward in one solid wedge. My Hero and one 4-4-7 leapt into CC with a concealed Japanese 4-4-7. My opponent would choose to keep them concealed...but they would be cut down trying to exit the building in the following turn.


 My armored cars weathered the initial rounds fired at them by the Japanese mortars!


 In his Prep Fire phase, my opponent quickly dropped smoke on my boys. This smoke would help cover the coming attack of a Japanese Tank Hunter Hero.

 With a fearsome battle cry, the Japanese Tank Hunter Hero came charging at one of my tanks. My surrounding armor and infantry unloaded against this lone attacker...but were unsuccessful. This intrepid Tank Hunter would trade his life for my tank successfully!


The Tank Hunter was successful in destroying my tank!

 So at this stage of the game, I had lost one tank and the Japanese Sniper had managed to KIA a half-squad of Chinese.
 

 On Turn 2, I again moved my units aggressively.  My tanks from the south rolled up to confront the mortars, while my AA and AT guns unlimbered and made ready for action in the center. And on the east side, my infantry again launched forward to get in position for close combat against a 4-4-7 squad.


Japanese tanks and guns also opened up on my forces with no successful hits.


 Another Japanese surprise was the 20L Anti-Tank rifle. It didn't land any hits...but not wanting to see what damage it might be capable of inflicting on my armor.


 Scott's Japanese laid down a lot of fire in Turn 2, but my boys were able to weather it pretty well.


 I set my AA and AT guns in a central position with primary concern being to have some defense against the Japanese air power. Meanwhile my boys from the south were moving towards the Japanese mortars.


 Watch the skies boys!

My Hero and 4-4-7 squad succeeded in winning the close combat and securing the second of two building locations. Their success was tied to the good combination of armor and infantry fire that reduced the Japanese 4-4-7 to a half-squad prior to the close combat.


My first boxcars would go on to disable the BMG on one of my armored cars.


 The Japanese continued to put down some heavy fire in their Turn 2 Prep Fire. But again, my boys were able to survive it.

A final look at the map as we called it a night in the middle of the Japanese Turn 2 Movement Phase. My Chinese made some decent progress, but there's a long way to go yet!

GRUMBLE JONES ASL 2015 - THE YEAR IN REVIEW


Grumble Jones December Scenario GJ027 "Wie ein Weihnacht's Stern"

$
0
0
Decided to do a hypothetical scenario for December. Back in the old days with the gang in St. Louis (Webster Groves to be specific), we would play a bunch of DYO scenarios over the holiday break. So here's a little what-if fun for Christmas Time.

Remember to open link in a new window to maximize the view. The PDF for this scenario can be downloaded from the The ASL Scenario Archive. (simply search on Wie ein Weihnacht's Stern or Grumble Jones)


And always remember, these monthly scenarios are presented for fun only and as a thank you to the readers of my blog.
 

ASL Scenario AP55 The Generalissimo's Own - Turns 3-4

$
0
0
Welcome to the Grumble Jones Christmas edition AAR of AP55 The Generalissimo's Own - Turns 3-4!!!

 Our Monday game found us once again in 1938 China, as my Chinese battled Scott Holst's Japanese. And in true John McClain style...there would be an overload of aggression from both sides as we channeled our inner Hans Gruber!!! 

 Starting with Turn 3, the Chinese had progressed along the road and taken some building locations. But the majority of the Japanese force had yet to reveal itself.

My boys remained vigilant...searching for the sneaky enemy!!


 Turn 3 saw the entrance of my reinforcements. I elected to send everyone in from the North. Scott's Japanese had plenty of armor and guns watching my possible entry hexes. Not sure if it was the smartest move (I'm not known for those anyway), but I decided to just rush right at him.


 Scott did a great job of responding to my attacks from two sides. His Japanese were unfazed by my attacks.


 As my armor and infantry moved up the middle, the Japanese mortar teams broke and routed away. But the Japanese sniper reappeared and quickly pinned my 37L AT Gun Crew. 


 Along the east edge, my primary focus was on taking some building locations to build up Victory Points.


 Going into Turn 4,  my forces had succeeded in eliminating the mortar threat. Every little bit helps, so I was happy to put those out of action. As for my armor...I wasn't as happy with their progress. The gully definitely slowed me down.


 Back at the center, the Japanese ATR team knocked out one of my tanks. My remaining forces moved a bit more cautiously and succeeded in revealing that J11 and I11 were dummys.

You know...revealing dummy stacks should always be a priority...right...?


 The Yuletide fun continued as my efforts in the North were met with fierce Japanese resistance.


My forces were rebuffed by the on-target Japanese fire.

 My Northern Force continued to struggle. One tank was blazing and the other was immobilized. But despite being immobilized, the crew continued the fight and set one of the Japanese tanks ablaze. Meanwhile my infantry shifted to the west as the other Japanese tank rolled their way.


 In the center...I just went nuts and sent my tanks directly at the Japanese tanks. I know it was crazy...but just felt like going for it.


Yep...it wasn't my smartest move...

 Turn 4 also showed the arrival of Japanese fighter planes over the battlefield.


Oh boy...can't wait to see what kind of presents they drop on me...
 No we arrive at the moment in Turn 4 that was just completely whacked. In my last Advance Phase, I moved two stacks of infantry under the blazing tanks. Seemed like a good place to launch my next attacks from. It worked better in my head than in real life. (I suffer a lot of that kind of thing.) 

Scott, quickly realized that my boys had just blinded themselves and rushed a screaming 4-4-7 with a Demo Charge right at the stack of two 3-4-7's with LMG's. OH NOOOOO....

Naturally, I completely missed hitting the squad in First Fire, Final Fire...we'll pause before discussing the Final Protective Fire...(it will be worth the wait).


Dude...it was totally a BOMB...


Freaking Crouching Tiger...hidden 4-4-7 stuff as all of my shots missed the charging Japanese.

And then it happened...Final Protective Fire...c'mon snake eyes....


You have to be kidding....


You said it Ralphie...you said it...


And it didn't. After KIA'ing a half-squad and breaking the other with my "12"...my opponent's DC succeeded in blowing up everyone left...scratch two Chinese Squads....


Noooo....ok maybe a little...but bad move on my part..."Stupid is as Stupid does"...


 So yeah...there you have it...my boys in the North were reeling...

 
 The relative positions in the North sector as the night drew to a close.


 The fight in the center was great fun! Lots of tanks shots...which hit...missed...or bounced. Going into Turn 5, this will be the sector to watch!!!


 A final look at the ASL goodness in the center. Can't wait to see how this engagement ends. 


Merry Christmas and Happy New Year 
to you and your families! 

Thanks for following Grumble Jones in 2015.

Remembering the greatest ASL DYO Scenario - The Battle for Webster Groves, Missouri 1989

$
0
0
In the summer of 1989, my high school buddies (some still in college...or in mycase...married and working) got together to do the ultimate DYO ASL Scenario. For years, we had talked about making an ASL map of our hometown...Webster Groves, Missouri. Webster Groves is often referred to as the Queen of the St. Louis suburbs. Back in the late 1890's and early 1900's its opulent, Victorian Mansions and tree lined streets were home to the wealthy middle class of St. Louis. Street cars connected this southern suburb with the city of St. Louis. Today, it's a highly sought after community to raise a family in...(if you have enough money...and you better bring a lot!).

So there, we were in 1989, contemplating this project. We had already done a giant Kursk map and an entire CG built around the Battle of Cherkassy. But now...we were ready to make an ASL map of a portion of Webster Groves in a time before Google Earth. Using geologic survey maps, which showed all the elevation contours and home locations, we made a map.(The current location of which is unknown to me at the present time.)


These two pictures show the young men that I spent many happy hours playing D&D, ASL, Midway, Panzerblitz, and many a miniatures game.
Of course our parents were a bit leery of college age men playing with toy soldiers. But these men went on to be a Lawyer, two highly placed Department of Defense Employees, a Kansas State Trooper, an intelligence officer whose work...we cannot speak of, and of course...myself...an Aerospace Industry drone. All in all...a group of men, whom I am proud to call my friends and ASL opponents.

DYO scenarios were our stock and trade back in the day. It seemed as if we were always coming up with something new.

Our first wargame table...strategically located in my bedroom. The scene of so much 1/72nd scale carnage.


Another ASL player and my oldest friend...since 1970 in Bristol, TN. Bill celebrates a Napoleonic Miniatures victory...back in the day.


Michael, one of the real creative geniuses our gaming group and the man who would take mapping the Battle of  Webster Groves to amazing lengths...to get it right.


Here we prepare for 16 ft. of Johnny Reb table top goodness...cause John Hill made everything great!


A Bundeswehr Huey coming in during a Fulda Gap miniatures game.
One of our epic Pacific Theater games on some nameless island held by the Japanese.


1945 Germany - as the Soviet hordes crash forward.

Michael stabilizes a Stuka's dive bombing run on a JS-III.


"ring...ring..ring..ring..."
Now...our group had completed the map and sides had been determined. Chris and Greg would be the US forces defending Webster Groves from a determined 1946 German assault led by Mike and myself. St. Louis was hugely strategic...right...!?!

So I answer the phone...it's Mike.."What's up? I ask. "Are you ready to go out and check LOS for our attack?" asks Mike in a dead serious tone. "Huh..are you serious?" I ask...as my wife gives me that look...you know the one...

"Yeah...tell your wife I'm coming to get you to go check out some map details." Mike says in a won't take no for answer tone. "Honey, I'll be right back...promise." I assure my less than happy spouse.

Location of Webster Groves in relationship to St. Louis...and that other St. Louis suburb...Kirkwood...a Tolkienesque sort of suburb...but I'll let Robert Zinselmeyer tell that story!!

So here we have the general area that was mapped out for our battle. The US forces were defending the Seminary and High School...with the Germans coming in from the left along E. Lockwood Ave.

So what LOS was so important to check out? Glad you asked! Located in the Seminary is a rather large tower...based incidentally on the one at Eton in the UK. 


Michael's force of King Tigers (yes, he always had to have the big cats in his OOB.) were coming down Lockwood Avenue and he wanted to see if US forces located in the top of the Eden Seminary Tower could see him as he came down the road.

So off we went to the intersection of Lockwood and Elm to see if we could make out the top of the tower. And guess what...we could!!  So we both planned our assaults based on the knowledge that our movements would be easily observed from far back in the US defense zone.

So...I had to admit...that Mike's idea had merit and would prove to be valuable during our game play.

My German OOB consisted primarily of Stugs with a ton of Grenadiers. I knew that US Tank Destroyers were watching the roads, so I trail-breaked through the woods. A few Stugs bogged, but the majority made it through. Together with my grenadiers, the Stugs managed to brush aside the Bazooka Teams and went straight into house to house fighting with the US MLR.


My partner, Mike, had the big tanks and half-track Grenadiers. His force was going to bull its way down Elm Avenue and then but across towards Maple for a thrust towards the High School.

Only problem was that Elm went down hill at Cedar. The US player had HIP'd AT Guns on the slight elevation along both sides of the road. King Tigers blazed up one after the other...I think 5 went up in flames before my partner (in a fury) halted his attack and pulled back.


And that was the end of the battle as memory serves. Mike was so incensed that his King Tigers had been destroyed, that we took a break and never returned to the scenario. I was a little bummed as my attack had been largely successful. Oh well...we've all been there in a game like that.

As for the US positions in the Eden Seminary Tower. A 7-4-7 with a 50 Cal HMG was positioned there and actually took some long range shots at Mike's Half-Tracks as they passed Lockwood headed into the Elm Street of death...or as we jokingly referred to it year's later...The Nightmare on Elm Street.

So ended our Battle of Webster Groves. Looking back so many years later,  it has become a fond memory and I think now how great it would be to hear Mike's voice on the other end of the phone asking me to go recon the battlefield with him. Such great memories.

So, leave me some of your DYO Scenario stories in the comments. I'm sure you have some that were pretty epic as well.

Here's to our ASL memories and to making awesome new ones in 2016.

Reflections on 2015 (warning...meanderings on a monsoon day here in Tulsa, Oklahoma)

$
0
0
2015...my 50th year and a pretty awesome one from an ASL perspective. Back in 2011, I first started this blog with absolutely no clue where I was headed and what I wanted to accomplish with it...if anything. My first blog posts were simple, dull...pretty uninteresting when I look back on them. 

I was inspired by the awesome miniature wargame bloggers and astonished by the quality of both their content and the volume of their readership. Their community is amazingly vibrant, supporting a huge number of bloggers. And their visitor counts are off the charts...500,000 visits on this site, 400,000 on that site and usually they have 100 to 400 followers. Amazing!!! So what makes their community different from ours???

I have pondered that question for quite some time. As ASL players we are fiercely competitive...and that is no less true of blogging. I wanted to compete with those top notch miniature bloggers. But how...??   


One of the very best miniature blogger sites out there is Wargaming with Silver Whistle. I highly recommend a visit, if you have not had the privilege to see it. You won't be disappointed.
     http://wargamingwithsilverwhistle.blogspot.com/

And when you scroll through a blog like this...it suddenly hits you as to why these blogs and their community is perhaps more active and vibrant than say the ASL community. 

The difference was/is right in front of me the whole time. It's the pictures...miniatures...modeling. I suddenly grasped that a key part of miniatures gaming is the modeling, painting, terrain building and showcasing of one's creations. Wargaming itself, was just one component of miniatures gaming and often the least blogged about part. It was the "EYE CANDY" of the incredible battlefield layouts, the beautifully painted miniatures. The terrain, so realistic, you were transported to Normandy, Tarawa, Waterloo...or Breed's Hill. ASL is a board game...not much opportunity for eye candy.

I pondered the issue for quite some time and my blog continued to kind of plod along. I had begun adding a historical picture to the beginning of my AAR's, but there was still something lacking...that ASL has more any other game....a story...a narrative...a way of retelling the game one player to another that is thrilling to hear, to relive and makes you want to dive in and play a game. You know the stuff that happens in OUR HEADS!

ASL plays out in our heads, every bit as much as it does on the game board. Our game doesn't have elaborate terrain boards, perfectly modeled tanks and figures. But it has an engaging and exciting STORY!! And frankly, beats out any miniatures game in that category.

But how to tell the story in a way that makes the average ASL game jump off the screen at the reader? That was the question I hadn't yet answered for myself. But in 2014, something magical happened. The PEGASUS BRIDGE CG happened as Chris Brackney (aka Big Kansas) and I spent that year engrossed in what stands as the greatest ASL experience of my life. From February to September, we played out the entire Coup de Main CG. And in the process, my blog grew to adulthood as I blogged each of our CG turns and added the story elements, which would become my stock and trade. 

The Pegasus Bridge CG had helped me find my blogging voice and tell a story that would make the pictures of the map come to life. Because...really...how many pictures of an ASL game in progress can you look at it...before you say..."yep...I've seen board 41 and yep...I've seen the counters before..." But when you combine that image with action, with historical pictures related to that action (in as much as is possible) and add the emotions experienced by the players...well then just maybe the narrative begins to flow and convey the excitement, the tension and the just plain fun that makes ASL the world's greatest WWII Tactical Board Game.

Yes, I admit...it took me a bit of time to finally get this blog rolling and I have to acknowledge the other great bloggers, whose work has and continues to inspire me on a daily basis -- you will find their links below the opening page of this blog. I look forward to reading and supporting their blogs in 2016 and hope that you will as well.

So in closing...thank you to each and every one of my followers, visitors and dedicated blog readers. Your support makes this blog a labor of love. Here's to 2016...may it be a great year of ASL for us all.

And may it be a wonderful year for you and your families!

See you next year!


The 2015 Grumble Jones Scenario Pack (For Fun only of course...and hopefully a couple of them are!!!)

$
0
0
Remember to open link in a new window to maximize the view. The PDF for these scenarios can be downloaded from the The ASL Scenario Archive. (simply search on Grumble Jones)


And always remember, these scenarios are presented for fun only and as a thank you to the readers of my blog.
 
A note about next year's scenarios. I will continue to produce a scenario each month for this blog, but you will see more hypothetical engagements as opposed to actual events. The flexibility to create something new and different is much more easily accomplished in the hypothetical realm. So hopefully that won't disturb folks too badly.
 
Looking forward to a great year of ASL in 2016.
 

ASL Scenario 17 - Lost Opportunities (Turns 1-1/2)

$
0
0
Our Friday night game saw the continuation of our replaying of the Paratrooper scenario suite. This night's selection would be ASL 17 - Lost Opportunities. My St. Louis opponent and I diced for sides and he received the Germans and I the Americans. 

Now at first glance, this scenario looks like a tough one for the Germans, and I felt that a solid up front defense would be the right way to play it. The Germans win immediately by controlling 4 buildings in the US zone of control. But...the Germans also lose instantly if they have less than 9 unbroken squads. And when you have 9 x 4-3-6's in your OOB...that could happen fairly easily, especially if the German elects to lead his assault with the fragile 4-3-6 squads.

My opponent would do just that, but the outcome of the first 1-1/2 turns would be surprising for us both!!!


Seems like it's always that way in ASL...because of those little things called dice...


I built my defense with a center strong anti-tank force- bazookas and the 57LL AT Gun. I really didn't expect my opponent to try for risking trail breaks..especially with 8 movement factor tanks. I placed one 30 Cal in B3 to cover the center and east flank. The other 30 Cal was on the second floor with great fields of fire. But in keeping with the name of the scenario...I had nothing but lost opportunities for fire. 

I would be channeling my inner Bill Murray for much of the night. (In fairness to myself...I had a tremendously rough week at work...made worse with new management. So it took me most of the night to get my ASL face on.)


 My STL opponent has a tendency towards cautious play, but on this night, he would move forward very aggressively and really caught me napping. The 9 x 4-3-6's did indeed lead the attack with cover from the German mortars on the hill. (first lost opportunity...I never fired my 2nd level MMG at either mortar...completely dumb on my part...and an error which will be corrected in my next Prep Fire.)


My opponent opened the game with the Marder attempting smoke and then HE. Both rolls failed and so the vehicle was marked No Smoke and No HE. But the AP shells fired later would be unwelcome!!
 Following the German turn, I finally decided to do some shooting. I had kept all my boys concealed during the German's first movement phase. Again, a decision that probably created lost opportunities.


It was time to reveal a unit.


 The two Pz35A's would be my target.

 My 57LL AT Gun barked out two shots and remarkably created two burning wrecks.

 The German's D-Fire would be punishing as the two 5cm Mortars dropped shells on either flank.


 The German mortars would be quite effective in the first German fire phases.


 A look at the east flank. Despite the mortar shells, I was fairly confident that my unit in B3 would hold out and be ready to repel the coming advance. I would be mistaken...


 And so they did during the German D-Fire as the combined mortar and Conscript fire succeeded in breaking my 3-4-7 with the MMG and my 7-4-7 with two Bazookas. Rolling back to back '11's" have a way of breaking you...Paratrooper Bad Ass or not...

 And in the midst of all that fun...I managed to roll and activate the German sniper who promptly pinned my MMG on the 2nd floor. That was special...

 So my Turn 1 accomplishments were the destruction of two tanks and nothing more.

 The US Sniper did also show up and managed to pin the German mortar in F7, which ended his Golden Corral...endless buffet of ROF...oh good grief...my STL opponents has an unbelievable ability to retain ROF. It's eerie sometimes...

ok...I'm just pointing it out...

The German D-Fire would continue to hammer me in the center and on the west edge. The mortar on the west flank managed a critical hit on my boys in C9. When the smoke cleared...the 7-4-7 squad was gone and so too was their 6cm mortar, which had not fired a shot yet. (another Lost Opportunity...I had planned to open up in the next D-Fire...but that chance never came around...). But as often happens...the next ROF shot with that same mortar came up "12"...thank goodness!


It was...but my opponent wasn't finished just yet.


Next up, the German kill stack with the 9-1, MMG, and HMG rolled snake eyes against the crew of my 57LL AT Gun...who were still celebrating their two tank kills.

In a flurry of machine-gun bullets, they were wiped out.


I wish...


 I kept my composure...after the week I had...just playing ASL was awesome...so go ahead...roll snake eyes...it's all good...


 The X's mark the positions that had been successfully eliminated and/or routed by my opponent. 

Yeah...I was feeling a little like Conan here...but remember he got out of this ok!


 Prior to starting Prep Fire, my opponent's wind change resulted in Gusts...so wind came into the game if only momentarily.


 The German turn 2 Prep Fire was ineffectual on the west flank, but managed to break my boys in C2 on the east flank. As they were in foxholes...things would end badly for them.


 The Germans would succeed in moving up on the east flank and capturing the broken 7-4-7 in C2.

I am going to have get more careful with my foxhole usage.


 A final look at the conclusion of the German phase of Turn 2. Overall, an excellent beginning for the Germans. They have lost their armor, but infantry is king in this scenario and so far, my opponent has kept his infantry completely intact as he heads towards at least 3 of the 4 required victory locations. It's going to get interesting to say the least!

Yes I do...Turn 2 US Phase...time for payback!


January Scenario - GJ028 "WULF HUNT"

$
0
0
Remember to open link in a new window to maximize the view. The PDF for these scenarios can be downloaded from the The ASL Scenario Archive. (simply search on Grumble Jones)

And always remember, these scenarios are presented for fun only and as a thank you to the readers of my blog.
 
PLEASE NOTE: This Scenario is a Hypothetical imagining of an event, which took place frequently as Operation Bagration unfolded in the Summer of 1944. Forward German airfields were often overrun as the Soviet forward units raced through the German forward positions.


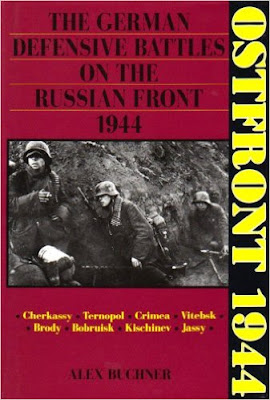
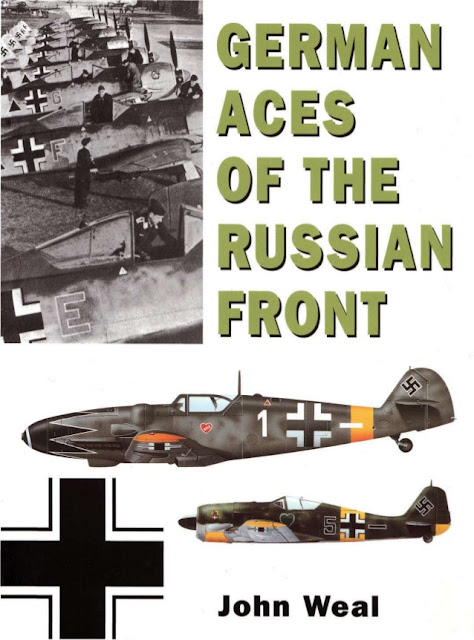
Incredibly, the Germans had fewer than 100 serviceable aircraft to support Army Group Center. My primary source materials for researching this scenario were John Weal's German Aces of the Russian Front and Alex Buchner's Ostfront 1944 .


I recommend this book to anyone with even a passing interest in the Eastern Front. This is one of those books that you just can't put down once you start reading.

John Weal's book is printed by Osprey and is just outstanding...no other way to describe it. Just a beautiful book, absolutely full of great pictures, color plates and information. I definitely place this book in the top 10 of my library.

So, as promised for 2016, this scenario will be the first of what could be a long string of hypothetical scenarios. Hopefully, they won't crash and burn!!!


ASL Scenario 17 - Lost Opportunities - The Conclusion!

$
0
0
Our Friday night game with my regular STL opponent saw the conclusion of ASL 17 - Lost Opportunities. While, the night's gaming was filled with tense and exciting moments...it would also prove once again the power of random events in the chaos of ASL combat.

I always thought that Spiers was a little off...but there is a touch of wisdom here. ASL is filled with moments of random frustration brought about by two small dice. And like Spiers suggests...it helps to just "roll" with it.

 The start lines at the beginning of the US Phase Turn 2. My hopes were high that I could get some badly needed breaks and slow down the German assault.

 And yes...I finally fired my second story MMG at the mortars...good grief was I in a fog in the previous game turns. Silencing the mortar on the west flank would ultimately prove to be ineffectual...but I was nonetheless thrilled at the time!


Something which I noticed during this session and was equally true in our last gaming session, is that my opponent's Defensive Fire Phases were very successful overall. My opportunities for skulking were few and far between. I had so few forces left, that I wanted them in position to stop movements and also to try and break some of the 4-3-6's running around.


Surprisingly, the 4-3-6's hung in there for much of the scenario. I broke the 4-4-7's almost more often than the 4-3-6's.
My STL opponent is a cautious player. Despite the obvious weakness of my much reduced defenses, he continued to fire rather than move. He wanted to knock out my MMG on the second floor, before moving aggressively up the center.


He would succeed in pinning my MMG and DM'ing the 3-4-7 manning the MMG, but again his units didn't move rapidly forward. He knew he had plenty of time, so was content to reduce my defenses even more.


I couldn't disagree with his assessment. With nearly 4 full turns left, there really was no need to risk getting too many squads broken.
In the very next rally phase...my dice aided the German cause. My DM'd MMG 3-4-7 crew rolled snake eyes as my 9-1 in a fury must have gone total Commissar on them!!!


Of course, sometimes...you gotta trust that your 9-1 knows what's he doing!!!
The next happy moment came when the German Marder shot the gap between A7 and B6. My anti-tank assets at this stage of the game were largely idle, so the Marder's biggest concern would be the MMG on the 2nd floor...but my 9-1 failed to take possession with dr of "6".


I had mistakenly written off the Marder after it was out of HE and Smoke. But it's 2 factor AP shells ended up causing me a lot of grief.
Despite having eliminated my MMG gun crew and the fact that my 9-1 didn't have possession...the Germans were still content to blast away on the east flank and center.


So the little Marder that could opened up on my last unbroken 7-4-7 in the center. An AP shell landed in their foxhole and for effect...SNAKE EYES...


Yeah...that's was a tough hit...but what followed on MC die roll put the icing on the cake.

Cause...every Snake eyes deserves a Boxcars!!!! UGH!!!!


Finally satisfied that my boys were sufficiently suppressed, my opponent launched the long awaited coup de grace!


My 9-1 finally got the 30 Cal firing away, but was unsuccessful in taking out the Marder crew. On the West flank, my 8-1 and 7-4-7 fired furiously into the woods to slow down the Germans.


The next movement phase by the Germans was calculated to reduce the potential risk of spraying fire from my 7-4-7. The goal was to get a squad into the D4 building and secure the first of 4 required building locations. The plan would work as I DM'd C3 and D3. But unfortunately they would leave a huge kill stack in C2.


At this stage of the game, the end was near. My opponent switched off operations in the center and to the east. The way forward was on the west flank.


My 9-1 with the MMG and my 8-1 and 7-4-7 were all that stood in the way of final victory.


Interestingly, my 7-4-7 on the far east flank defied the odds and survived all the fire thrown at him by the Germans. They would succeed in keeping the Germans from making any progress along that flank.


They would inflict the most punishment of any of my units in this scenario.
The final German movement phase was aided when my 7-4-7 in D2 broke, leaving my 8-1 to face the entire German force by  himself. The Germans would secure three buildings in one fell swoop. 


The end came in Advance Phase the German 8-1 led the charge into the final held US building. My 8-1 leveled his M1 Carbine and prepared to defend himself at 1-10 odds.

ANGREIF!

As the close combat ended, the Germans had secured their 4th Building location and the immediate victory!

For the Germans, a victory and a well-earned rest.

Grumble Jones Book Review

$
0
0
To wrap up the month of January, I decided to do a brief review of a few books from the Grumble Jones Library.


One of the signature behaviors of nearly all ASL players is a love for books and not just any books...but books that cover WWII action in words and pictures that are accurate, detailed, and pertinent to the event covered. As a rule we shy away from the $10.- WWII history books at Books-A-Million. We are not interested in the coffee table version of WWII history. No...we want detail and more detail...tell us how many Panther Tanks were at Kovel and who was in command of each one...and oh tell us the numbers on the turret...don't skimp on the information. We want it all. So the books offered up today are intended to scratch the ASL reader's itch. Hopefully you will see a title you hadn't seen or considered before. So my friends...stay thirsty...for knowledge...stay thirsty!


Let's start with the Korean War in honor of MMP's "Forgotten War" release. Not WWII...but ASL nonetheless and a war that we could do more to learn about. 


John Toland is one of the author's whose many books filled my childhood reading. Toland's coverage of the early days of the war stand out for the starkness of the situation for the outnumbered US forces as they fell back to the Pusan pocket.

I can think of no other action, which so dramatically answers the question of how the American combat infantryman would hold up in the darkest circumstances. 

We cannot honor our Korean War veterans enough...


Max Hastings...need I say more...one of the greatest military writers of the contemporary generation. Hasting's gives a higher level account of the war and includes some of the experiences faced by the United Kingdom forces engaged in that awful war.

And Hastings is bold enough to discuss the need for the war. To hear an Englishman explain why America and its allies needed to fight that war...are every bit as important to know today as they were then.

And indeed...the Korean War has yet to end...


The final volume to look at today is David Douglas Duncan's outstanding...THIS IS WAR. In my opinion this is the definitive photo history of the Korean War.

Duncan breaks the volume into three parts: The retreat to Pusan, the battles of Inchon and Seoul, and the retreat from Chosin Reservoir.

His images are some of the best ever taken of American soldiers in combat. Many of them are unflinching in revealing the horror of war both physical and emotional. 

Duncan's camera is able to capture what words often fail to deliver.  And again, these images will inspire respect and pride for our veterans.


Duncan's camera captures the exhaustion of war and retreat in Cpt. Ike Fenton's face.


The fall of Seoul is well documented and should give ASL players a very good sense of the urban combat that occurred in the Korean War.
 

Duncan's images remind us that there is a horrific cost to war. Something we ASL players must never forget.


So there you have it. The first edition of the Grumble Jones Book Review Post. Future reviews will cover books relating to specific actions, units or theaters over the coming year. Hopefully, this will be an interesting monthly post.

This post is also dedicated to my very good friend and Korean War Veteran, Don Boelhauf. Don taught me a great many things as I began my career as a young buyer. In 1994, Don and I traveled to Oxford, MS from St. Louis, MO. As our plane winged its way south to Memphis, Don leaned over the aisle to tell me about his experiences in the Korean War. Up to that point, I had no idea he had even served in the military. I'll never know why he opened up about it, but his story has stayed with me to this very day.

Don arrived in Korea and reported to his unit's CP. Don had been assigned to a Signals Battalion. His CO informed him that his unit was out laying cable and would be back in the evening. Well evening came and went and his unit never reported. The next morning Don was informed that his entire unit has been wiped out in a North Korean ambush. Shaken to say the least, Don was moved over to the Quartermaster for his future details. With a ruddy faced smile Don went on to tell me that he began drinking heavily at that time and concealed his alcohol in a grapefruit can. In this way, he managed to cope with his situation. His drinking also managed to save his life. One day, while drunk and driving his jeep, Don caught the attention of a North Korean anti-tank gun. As he weaved down the dirt road, shell after shell missed him. When he finally realized  his was being shot at, Don bailed out of the jeep moments before it was hit and destroyed. 

I sat across from Don with my chin on the floor of the aircraft. I had never before heard such a story. Don just laughed and began preparing me for our meeting with the Japanese at the Hitachi facility in Oxford, MS. He never spoke to me again about the war. Don and I worked together from 1993 until I moved to Tennessee in 2000. Don died of prostate cancer in 2005 after a valiant fight against it.

I never got to tell him, what a difference he made in my life. I can only hope that he knew, what was unsaid between us. So Don, this post is for you.

BOELHAUF, DONALD T  

SGT   US ARMY

KOREA

DATE OF BIRTH: 06/08/1934

DATE OF DEATH: 11/12/2005

BURIED AT: SECTION 1CC  SITE 653 Click to view the cemetery map

JEFFERSON BARRACKS NATIONAL CEMETERY        

Something worth checking out and hearing Dave and Jeff of the 2-Half Squads.

ASL Scenario 18 - The Roadblock Turns 1-4

$
0
0

Our Friday game saw my STL Opponent and I once again pulling a scenario from Paratrooper. On this night, we would play out the first four turns of ASL 18 - The Roadblock.

This will be the final Paratroop scenario for us as we move on to some other theaters of action. While I love the Paratrooper scenarios...I am ready for something different. It's been tough battling against the American 7-4-7's these many games. My STL Opponent and I had the opportunity to play both sides throughout the Paratrooper scenario replays and both had varying degrees of success. As we played through these, it brought me back to the 1990's when I still lived in St. Louis and my opponent and I played all of these on my old card table in a basement in O'Fallon, MO. Life seemed simpler then and our gaming filled with a lot less work stress. Fast forward to 2016 and both of us are much older and suffering equally from rough times in the work world.

So it was a welcome escape to transport ourselves once more to the Normandy Bocage...


 My opponent drew the Americans and hence the defense. My Germans have to exit 20 VP worth of men and tanks on the south edge of board 24. N <- is that way. Keep in mind by SSR there are no hill or valley hexes. It's a flat area criss-crossed by bocage.


 Turn one, my Germans must all enter through Hex 4I1.  I lead with the MKIV and Marder 1. Both have a squad with an LMG. They zip to the southeast and uncover no enemy units.


My tank assets were nothing to write home about...but my thinking was to just run them off the board as fast as possible to get a quick start on the 20 required exit points.

 My Grenadiers followed up in stacks of three, each with a leader. Given the long range from the Americans...I decided to risk a bad hit from the US 9-2 and his MMG. My boys in D4 paid for my folly. Even a 2 factor shot down 4 is not a good thing. My 7-0 rolled boxcars and went down...and two of the three squads were turned into half-squads. OUCH... 


 One of the other reasons for taking such a risk was also due to the SSR for German movement after Turn 1. A DR prior to each movement phase dictates how many squads may move that are not with a leader.
 While my 7-0 went down with a boxcars...one of my squads rolled snakes and created a Hero. Hmm a 7-0 for a Hero...yeah...I'll take that trade any day.


 At the conclusion of Turn 1, my forces hadn't really moved all that far.


 In the US portion of Turn 1...a great and mighty thing happened!!! The MMG with the 9-2 MALF'd and would stay that way for three consecutive rally phases.


 With MMG silenced for the moment, I began moving fast and furiously forward. I had a lot of ground to cover.


 As my Grenadiers struggled to make up ground, my Marder and MKIV trundled through what I hoped would be a gap in the American lines. I knew the 57L AT Gun was hidden somewhere...but I hoped it wasn't where I was headed.

Of course it was waiting for me. The crew targeted my Marder I as it followed behind the MKIV. It had to change its covered arc...so the first shot had almost no chance. But dang! He rolled a 4, kept ROF and then rolled a 3 on the second shot. Just like that my Marder I was toast.


Pretty nice shooting...
My opponent tried to console me with..."It was a lucky shot." Yes it was...


 Next up...my opponent channeled his inner Private Ryan to try and bazooka my MKIV from behind. Thankfully he missed.


 Meanwhile my Grenadiers continued to surge ahead. The Americans, minus their MMG could only watch.


 As my boys moved up, my opponent made some moves to shore up his center.


 I had correctly guessed that a bazooka team was concealed in V0 to the east. They were just waiting for my MKIV to move into the orchard hex. My dismounted riders who, rolled for smoke..."1" yeah baby! As soon as the smoke was popped, my MKIV gunned the engine and rolled forward. A bazooka round passed to the rear as it sped away. Just like that my MKIV was through the American lines and in the clear!

 Time to make tracks!


 My MKIV would successfully exit the south board edge!


As these may be my only victory points of the game...I'm going to celebrate a little!!
 I knew that the US MMG with the 9-2 would eventually be repaired. It was and it proceeded to mangle my 9-1 stack with 2 x MMG's. I had used this stack against the US 9-2 but both my shots were 10, and 11...can't do much against a stone building with those kinds of rolls.

But...on the third ROF shot, my opponent MALF'd the MMG again.


 It took a while...but my mortars finally got into range of the 9-2 and began dropping rounds on the position. Lots of hits...but no effects.


 I continued to Prep the US 9-2 position...but did absolutely nothing...not even a PTC. Meanwhile I rolled a 4 for how many leaderless units could move. And that would be a problem as I had begun to thin my stacks as I got closer to the US lines.


 I continued my desultory fire on the US 9-2 position...but again to no avail. My other forces moved up, but took fire from both US flanking positions.


 The relative German and US positions at the conclusion of Turn 4. Completing 4 Turns in 2-1/2 hours was a quite a feat. It's nice to keep a good pace of play now and then. My Germans have made some solid progress, but as we head into Turn 5, the Americans can begin receiving their reinforcements..5 x more 7-4-7's is not something that excites me...

Already looking forward next Friday's game.


The US 9-2 represents 1st Lt. Turner Turnbull.

1st Lt. Turner B. Turnbull of the 505 PIR of the 82nd Airborne served in Africa, Sicily, Italy and Normandy. He was killed-in-action near Ste-Mere-Eglise, 7 June 1944.

 "Colonel Vandervoort detached a platoon under Lt. Turner B. Turnbull and sent it to organize a defense at Neuville which was reported to be lightly held by the enemy. Lt. Turnbull moved through the town without opposition and deployed his men on the high ground north of the town. He was hardly in position before the enemy attacked with a force outnumbering the defenders about five to one.  The platoon fought stubbornly and for eight hours held its ground. The small action had a significance which Turnbull did not realize at the time. The fight at Neuville kept the enemy in the north at arm's length while the defenders of Ste. Mere-Eglise beat off a simultaneous attack from the south. The cost of the platoon's gallant stand was heavy. Only sixteen of the forty-two men who had gone to Neuville-au-Plain survived to be withdrawn late in the afternoon to rejoin their battalion". Lt. Turnbull received the Silver Star for this action. He was killed later by German artillery fire.

Lest we forget.


Grumble Jones February Scenario - GJ029 "Ghosts of the Carpathians"

$
0
0

Remember to open link in a new window to maximize the view. The PDF for this scenario can be downloaded from the The ASL Scenario Archive. (simply search on Grumble Jones or Ghosts of the Carpathians)


And always remember, these scenarios are presented for fun only and as a thank you to the readers of my blog.


Design note - this scenario is a hypothetical imagining of the exploits of Walter Girg and the men of the 502nd SS Jaeger Battalion during their time behind Soviet lines in 1944 Rumania. 

It was difficult to find much info on the net about Operation Landfried. Feldgrau and Axis Forum only yielded a few tidbits of info. 


"Ustuf. Walter Girg lead a company of around 105 men (1./502) during the operation LANDFRIED in Rumania in 1944. The company was sent behind enemy lines on the Carpathian mountain passes to scout the main directions of the Russian attack. Girg was captured in the process but managed to escape and though wounded reached the German lines with important information, that eventually saved Army Group F from a certain encirclement. For this action he received the Knight's Cross and was promoted to the rank of Obersturmführer."


 So again...I have taken a great deal of dramatic license in the creation of this particular scenario.


Viewing all 557 articles
Browse latest View live